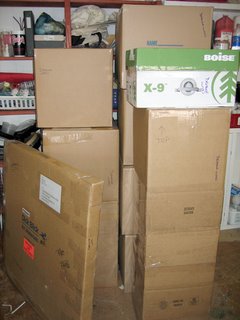
 Packing artwork has been on my mind lately. I’ve spent the last couple of weekends packing up most of my work (10 boxes!) to ship off to a solo show at the Truckee Meadows Community College in Reno, Nevada. And I'm helping to make the boat payment for my local UPS Store owner...
I’m not an expert on packing and shipping artwork, but I have worked as a gallery assistant and I’ve unpacked artwork for a couple of national juried shows. So I do consider myself an expert on how NOT to pack and ship artwork. I have seen some amazingly stupidly packed boxes!
So I thought I would share some observations, tips, and techniques for packing and shipping that I’ve picked up over the years.
Reusable packing materials
First of all, if you’re shipping work that you know will be returned to you (a juried show, for example), then be sure to use easily reusable packing materials. Think about what it must be like at a juried show – there’s work coming in from all over the country, the people unpacking and repacking your work could be volunteers with little or no experience handling artwork – you want to make it as clear as possible for them to unpack your work and repack it after the show.
Avoid using packing peanuts. They’re not good protection because they can settle during shipping. They’re also a complete pain in the ass and gallery assistants hate them with a passion (at least my coworker and I did).
Clear instructions
It’s helpful to mark the spot on the box where you want it opened. As a gallery assistant, I LOVED the anal-retentive artists who sent unpacking and packing instructions (if you’re unpacking 50 boxes, you don’t want to have to think too hard about any of them). Just make it as easy as you possibly can. You don’t want the person who will be handling your artwork to be hating on you because you made her spend 20 minutes picking up peanuts or you wrapped something really tightly in so much bubble wrap that it won’t go back in the box later or realize that she opened the wrong end of the box and will have to spend extra time fixing it when she re-packs. Oh. Sorry. Flashbacks…
So when I pack something that is fairly complicated, I will include instructions. Pictures are also helpful, especially if the instructions are complicated.
Here’s an example of some instructions I wrote up for a fairly complicated package. I had 3 artist’s books in one box, and they had to be put back “just so” in order for them to fit. pdf file (120 KB)
Padding
Basically, you want to have as much protection between your artwork and the cold, cruel world as possible.
I pack my paintings in foam core boxes that I make myself. I then stack a few of those boxes inside a cardboard box. I line a larger box with foam and include the smaller box inside. So I basically have the paintings triple-boxed.
 a recent batch of foam core (and a few cardboard) inner boxes
Airfloat boxes
http://www.airfloatsys.com/
I’ve never used them myself, but I have unpacked quite a few. I think they’re fairly expensive, but they might be worth it for you.
The boxes are reinforced, easy to open, and re-usable. The boxes include 3 sheets of foam – one sheet protects your artwork on the bottom, one on the top, and you create a hole in the center piece of foam so that your piece fits snugly into it.
Crates
If you have tools and carpentry skills, you can make your own wooden crates. You can also have them made for you. Crates are expensive to ship because they’re usually heavy, but they can be good protection for your artwork, especially sculpture.
If you use a crate, be sure to mark very clearly which screws should be removed to open the crate.
To sum up, here is a basic list of packing tips that I created for local juried show participants:
Protect the artwork from dust and moisture:
- Wrap the artwork with protective, acid-free paper such as glassine or tissue paper
- Cover the artwork with white cotton fabric (recommended for textiles, ceramics, and wood)
- Wrap the artwork loosely in plastic
Protect the artwork from damage:
- If possible, use two containers; a smaller box cushioned on all sides inside a larger box can protect your artwork from bumps and sharp objects
- Insulate the artwork with padding such as bubble wrap, upholstery foam, or Styrofoam. NOT recommended: loose material such as any type of Styrofoam peanuts.
Identify your artwork:
- Include the artist’s name and the title on the back or bottom of the artwork
- Write your name on all exterior sides of all shipping containers using permanent marker
- Cover any paper labels with clear tape
- Identify your container as “FRAGILE” (ask your shipping company for labels)
- Identify where you would like the container to be opened by writing “OPEN THIS SIDE,” or “OPEN HERE”
- Include detailed unpacking and packing instructions
Resources:
http://www.airfloatsys.com/ - inexpensive, re-usable packaging solutions for shipping fine art
http://www.lightimpressionsdirect.com/ - archival materials
http://www.uline.com/ - boxes and plastic bags
Update:
For textile artists, check out Lisa Call's post where she explains how she ships large quilts.